The Animation
This short was made for our second year group project unit based on a brief from the RNLI, and then later polished over the following summer for the BFX competition. Our team was Hannah Marsden, Sara Taveres Conduto, Spassia Kazaska, Joey Kim and myself. The team was supervised by Oleg Fryazinov.
As the animation went on to win Best Overall Animation, Best Character Animation and Best Art and Design in the BFX competition I thought it would be worth sharing what my contributions were in case anyone else found them useful or wanted to expand on them.
In terms of software, lighting and rendering were done in Maya while FX and simulation were done in Houdini.
In Scene Paint Effects
Paint Strokes
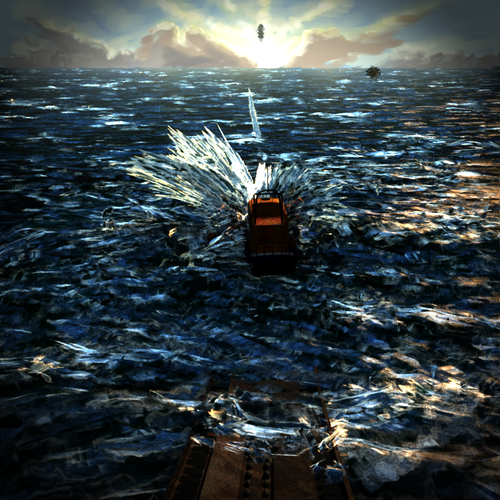 For the ocean I used a combination of an ocean spectra and FLiP simulation through a guided ocean layer. On top of this I applied a system of paint strokes which flowed across the surface of the fluid. These were guided by the velocity and concavity of the surface to produce curves representing each brush stroke. A shader then used this information to colour each stroke, using varying shades of blue in concave areas and white foam in fast moving and convex areas. It also uses a paint brush mask for opacity and as a bump map. The curves are rendered as ribbons aligned with the underlying normals of the fluid surface.
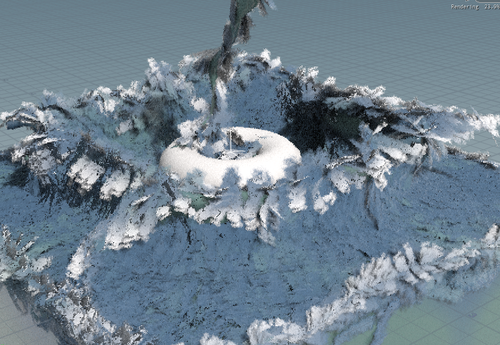 An early attempt at the paint stroke style which used a simpler method of bent image planes.
This ended up unable to properly conform to complex surfaces.
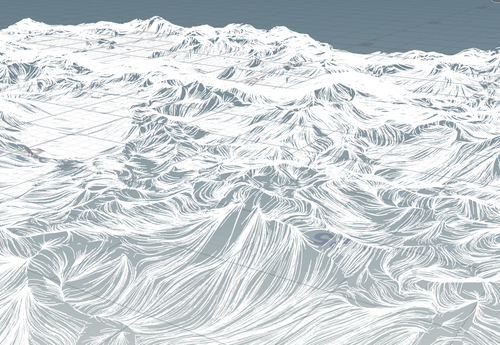 An early version of the paint curves on an ocean spectra.
Applying the effect to a FLiP simulation provided some additional challenges. The varying topology made temporal consistency even more challenging. This ended up being unavoidable to some degree, but could be reduced by deleting points based on the id of the FLiP particle, instead of the point number. This allowed more consistency in which points were deleted each frame to create the seed points that the curves flowed from. To improve the splash, the seed points of the strokes were separated based on speed and the FLiP droplet attribute, with slow, non droplet, points using the previously described surface flow. The isolated splash points then used a modified flow method which takes less notice of the mesh surface and instead also follows a vector field generated from the FLiP particles, allowing them to move in a more dramatic, but still consistent way.
For the cliff in the background, the initial geometry was sourced from
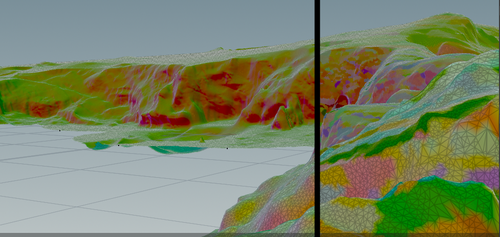 (Left) The cliff original normals - (Right) The stroke normals partly blended with the original.
Shader
On hand crafted assets, such as the boathouse, boat and Mary. We used a shader to give the asset its appearance as paint strokes would have disrupted the models too much. The assets were already modeled and textured with the style in mind.
This shader used an Arnold toon shader as a base, with the gradient modified by an animated paint strokes texture projected from the camera view. The textures of the asset were also warped by version of this texture where each stroke acted as a UV offset.
This helped to give the assets some motion, needed to blend them with the dynamics of the water. Otherwise they would appear very static in comparison.
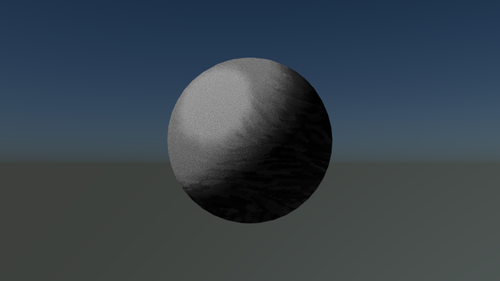 The shader on a grey ball.
Postprocess Paint Effects
First, the shots were composited normally in Nuke, with depth, normals and motion vectors being preserved for the next step. These results, final apart from colour grading, which was done after, were then brought into Houdini, with the images becoming attributes on a grid of imgresX/imgresY size.
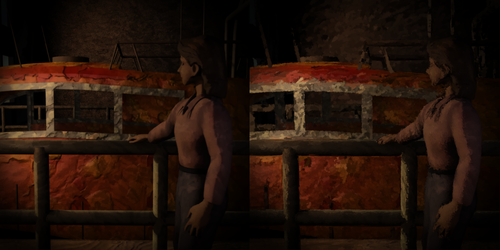 Before and after the paint post process
A similar process to the in scene paint strokes were then used, with the strokes guided by the previously stated attributes to flow over the image and conform to its structure. They were then rendered using the same process as in scene but without any lighting.
The exact weights and effects of each parameters were varied per shot as to allow artistic control over their result. In general, the flow conformed to the gradient of the value in the image, sometimes flowing with and sometime perpendicular with the gradient depending on the specific attribute and shot.
Additional constraints were used to avoid jumps over large depth or normal variances, as to avoid strokes bleeding between objects.
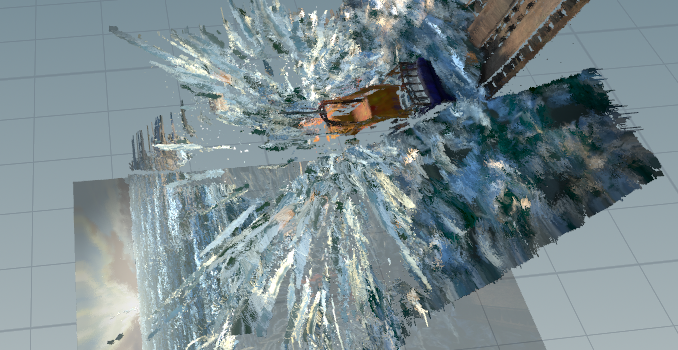 As can be seen in the above viewport screenshot, the strokes were ordered by depth with a small amount of randomness. This avoided z-fighting issues in earlier versions.
Potential Improvements
A number of areas of the effect could be improved. Probably the biggest area would be the temporal consistency and artistic control over the result. As of the end of the project, tweaking the process involved digging through VEX code and complex node networks. A more general and unified tool, with additional artistic controls. Would be a useful project for future work. Perhaps a custom or modified fluid solver could be created to produce additional data for the stroke generation and improve the consistency and performance.
Since the project I have become aware of several other methods for postprocess painterly effects, such as the many variants of the Kuwahara Filter. If I had been aware of this at the time, it might have influenced the methods used. For this specific case, where the image was already stylized in camera and the long curved strokes of our method add to the appearance, I think using curve based strokes works quite well.